
SEI is the token of the Sei Network, a blockchain built for speed and trading. In India, the token is trading around ₹25–₹27 per coin in August 2025. If you are new to crypto, here is a simple guide to buying SEI in India.
Step 1: Choose an Exchange
The first step is to choose where you want to buy SEI. Exchanges are online marketplaces for cryptocurrencies. In India, platforms like CoinSwitch, Giottus, Flitpay, and Mudrex allow you to buy SEI directly using Indian rupees. These apps are easy to use and support UPI payments, which makes them convenient for beginners.
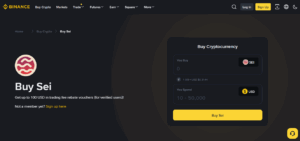
You can also use global exchanges like Binance or KuCoin. These platforms have more buyers and sellers, so trading is often faster and prices may be better. However, they usually require you to first buy a stablecoin like USDT with rupees and then exchange it for SEI. This adds an extra step compared to Indian apps.
Step 2: Create and Verify Your Account
Once you have selected an exchange, you need to create an account. You can sign up with your email address or mobile number. After creating your account, the exchange will ask you to complete KYC verification.
KYC means “Know Your Customer.” You will need to upload documents such as your PAN card, Aadhaar, or another government ID. This process is required in India before you can add money and start trading. Verification usually takes a few minutes to a few hours.
Step 3: Add Money to Your Account
After your account is ready, you must add funds. On Indian exchanges, this is simple. You can use UPI, net banking, or a direct bank transfer to deposit rupees into your trading account. This makes the process quick and familiar.
On global exchanges like Binance and KuCoin, the process is different. These platforms often use peer-to-peer (P2P) trading to help Indian users deposit money. In P2P, you pay another verified user through UPI, and the exchange releases the stablecoins (like USDT) into your account once the payment is confirmed. This method is safe if you follow the rules, but it requires a bit more care. Always trade only with verified merchants to avoid fraud.
Step 4: Buy SEI Network Crypto
Now you are ready to buy SEI. On Indian exchanges, you simply search for SEI in the app and select the SEI/INR pair. Enter the amount you want to buy in rupees, confirm the price, and place your order. The SEI tokens will appear in your account wallet after the transaction.
On global exchanges, the process has one extra step. After you have bought USDT through P2P, you go to the SEI to USDT trading pair. Enter the amount of USDT you want to convert into SEI, confirm the trade, and your SEI will be credited to your account wallet.
Step 5: Store Your SEI Safely
Once you have bought SEI network crypto, you need to decide where to store it. You can keep it in the wallet provided by the exchange, which is convenient for beginners. However, many users prefer to move their tokens to a private wallet for extra security. Popular wallets that support SEI include Keplr and Compass.
A private wallet gives you full control, but it also comes with responsibility. If you lose your private key or recovery phrase, you lose access to your SEI permanently. Always write down your recovery details and keep them safe.
Things to Keep in Mind When Buying SEI
Crypto trading in India is allowed but regulated. Profits from cryptocurrencies are taxed at 30%, and there is a 1% TDS on every transfer. This means you must keep a record of your buys and sells to report them correctly at tax time.
SEI’s price also moves quickly, like all cryptocurrencies. Always check the latest SEI price before buying. Compare the effective cost between Indian and global platforms, as fees and spreads may make one option cheaper than the other.
Buying SEI in India is simple once you know the steps. First, choose an exchange that supports SEI. Then, create and verify your account. Add money through UPI or P2P. Place your order and buy SEI. Finally, decide where you want to store it.
Indian exchanges make the process easier for beginners, while global exchanges offer more liquidity. Above all, choose the option that fits your comfort level, keep your tax duties in mind, and always store your tokens safely.
